Building a hex grid with SpriteKit
A large portion of the gameplay of The Forest will take place on a hex grid akin to board games like Terraforming Mars, Gloomhaven, and 1861: The Railways of the Russian Empire1. The majority of the board will be tiles that are never interacted with; these will just display some trees and will help give a sense of scale to the area. The remainder will be interactive tiles that can be flipped over to chart your course through the woods. In my head, I assumed I’d need to render each tile manually by looping through every column and every row and drawing the tile with a bit of offset on each row so they stack neatly. It turns out that SpriteKit already has this covered for us with SKTileMapNode.
The idea behind the SKTileMapNode is to draw background maps akin to something you’d see in the 2D Zelda games. For example, you might have some grass that turns into a desert and has a river running through. This would typically be generated in advance and Apple provides a way to create these kinds of maps using the SpriteKit Scene Editor within Xcode2. They also provide a way to procedurally generate maps if you want to create something randomised including adjacency rules so you can specify complex ideas like how a shoreline should work3.
I don’t need anything quite that sophisticated but this does work well in terms of generating a random distribution of background tree tiles for my map. To begin with, I have 10 different images for the hexes I want to generate as my base map all courtesy of the excellent Isle of Lore 2 Hex Tiles Regular set by Steven Colling.

These images can all be placed into a SpriteKit Tile Set file within Xcode where we can define that they are of a “Hexagonal Pointy” type4. With that done, it’s a simple case of adding the map to our scene:
guard let tileSet = SKTileSet(named: "Forest Tiles") else {
fatalError("Could not find Forest Tiles set")
}
let map = SKTileMapNode(tileSet: tileSet, 8: columns, rows: 8, tileSize: .init(width: 210, height: 210))
map.fill(with: tileSet.tileGroups.first)
map.name = "background"
map.zPosition = 0
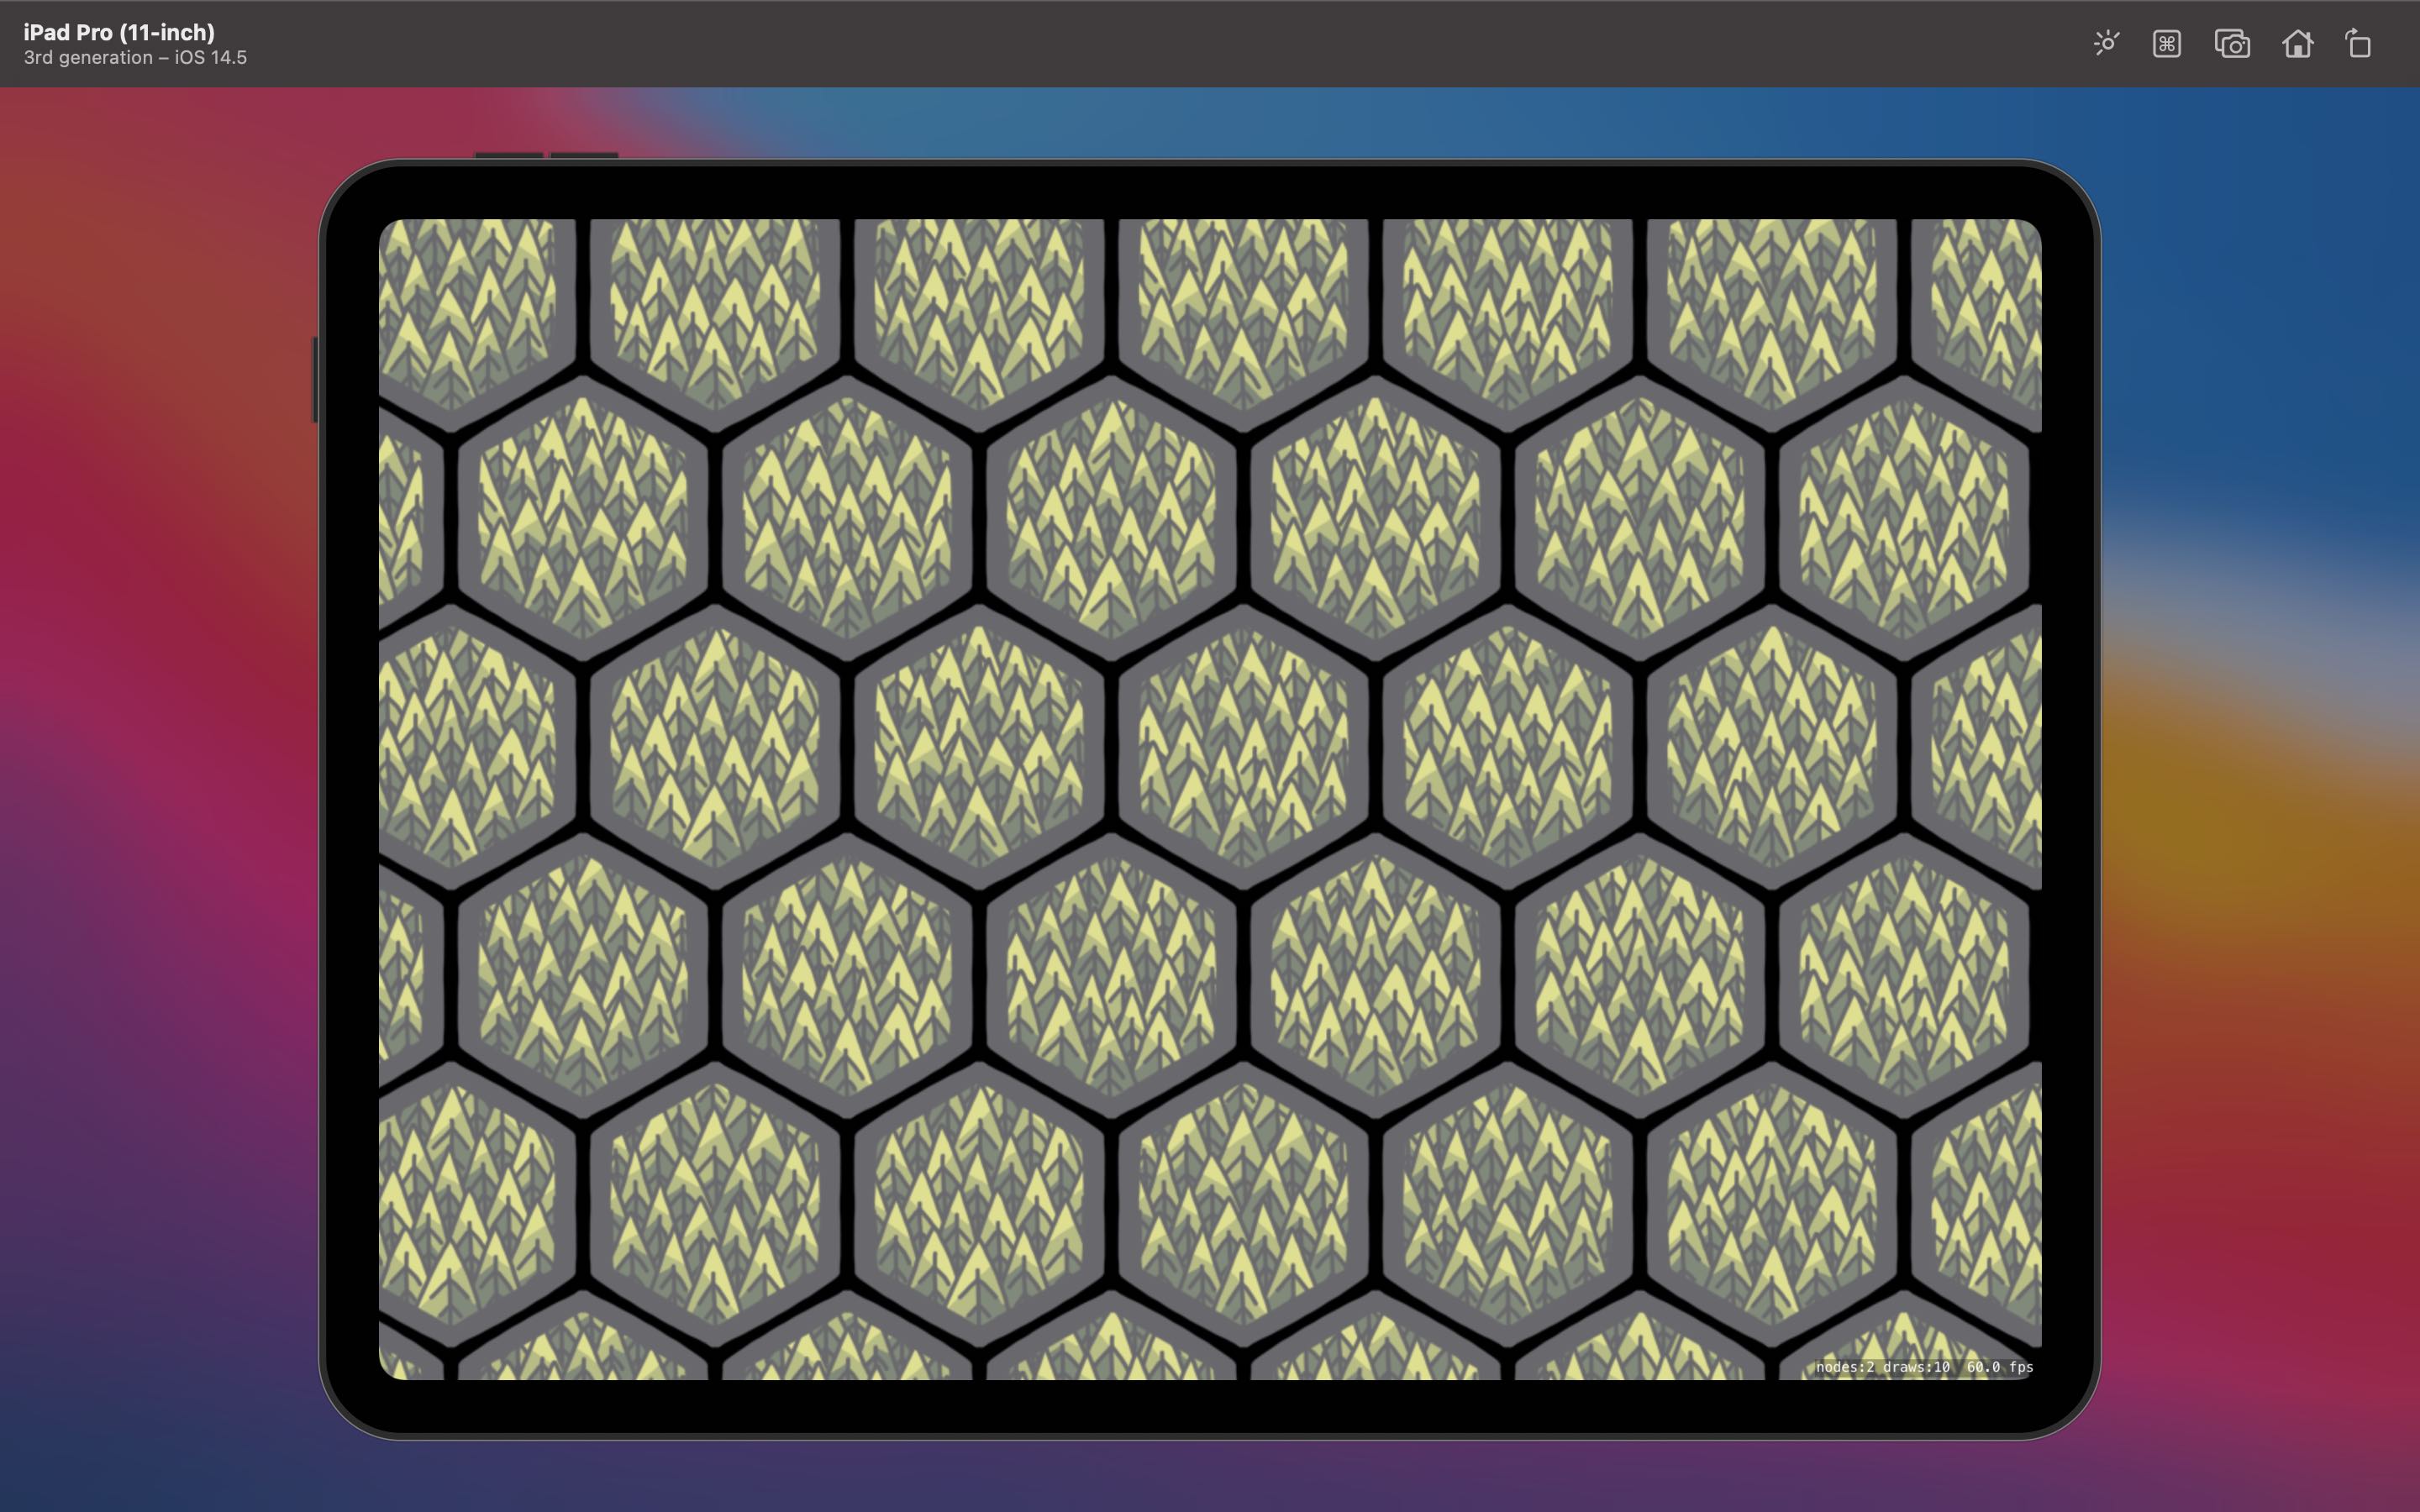
addChild(map)When creating the SKTileMapNode we tell it which SKTileSet to use (based on the *.sks file we created earlier), the number of columns and rows we want, and the size each tile should be displayed at. We then tell the map to fill using the tile set which will generate the map using a random mix of the 10 tiles we made available. Finally we name the node for use later on, set the zPosition to be 0 so it sits below everything, and add it to the scene. The end result is a fixed hex grid with a random distribution of tree images:
The main advantage to this method (beyond concise code) is that it is also far more efficient as it is a single node within SpriteKit; adding each tile manually would result in a node for every tile. However, we can’t interact with this grid so we need to do some more work in order to add our actual game tiles.
Fortunately, it’s fairly easy to ascertain where we are on the tile map as there is a centerOfTile(atColumn column: Int, row: Int) method which gives us a CGPoint for the center of a defined tile. All I need to do is choose where I want my real tiles to go (by way of a grid reference) and then add them to the scene using the position that the tile map returns for that particular reference.
I’m planning on having tiles flip over when you interact with them which adds an extra wrinkle as you’ll be able to see this base tile map behind the flip animation. To do that, I need to ensure that when I add a tile on top of the map that I also alter the tile group to use a blank hex that is the same colour as the background of the scene:
let definition = SKTileDefinition(texture: SKTexture(imageNamed: "hex_background"), size: .init(width: 210, height: 210))
let group = SKTileGroup(tileDefinition: definition)
map.setTileGroup(group, forColumn: column, row: row)
After playing around with light nodes and overlays (which I’ll detail in a later post), a test rendering looks something like this:
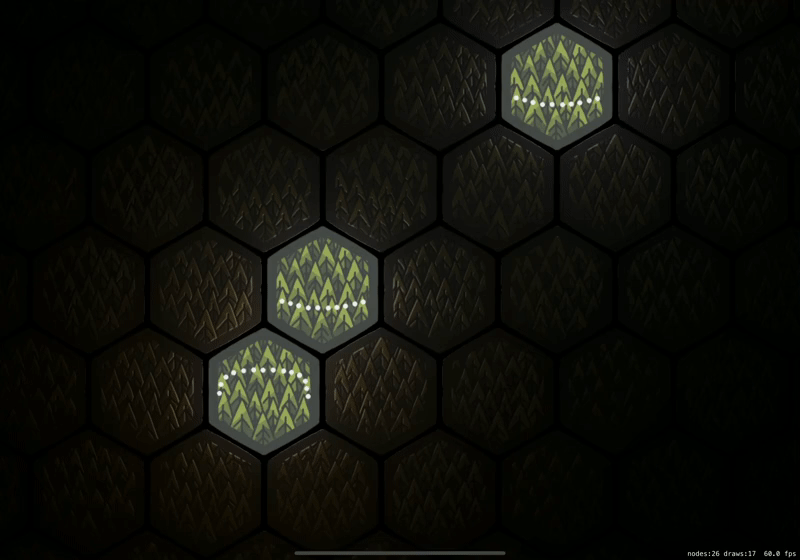
Whilst the scene has lighting and multiple visible hexes5, it’s really only made up of the six tiles you see on top (which look like background tiles until an animation appears to make them flip) and the background tile map with a few blank hexes strategically placed. I’m very happy with how easy it was to get started with a hex board in SpriteKit and will now be moving on to the process of generating the various tiles that will be placed on the board.
-
A personal favourite of mine. Trains? Stock markets? The ability to screw over your opponent, perform a hostile takeover of their company, then drive it into the ground for personal gain? Perfection. 👨🏻🍳🤌🏻 ↩︎
-
It’s a wysiwyg interface suitable for a designer to create a map with no programming knowledge. Check out this tutorial from The Liquid Fire to see it in action. ↩︎
-
For a deep dive, check out this tutorial from Hacking with Swift that shows you how to create a procedurally generated map with water, grass, and sand. ↩︎
-
Other choices include “Grid”, “Isometric”, and “Hexagonal Flat”. ↩︎
-
I forgot to take an animation when I originally built this feature so had to use one once other work had already been done. You can learn about the lighting in my next article. ↩︎