Path generation
One of the key parts of The Forest is the gradual exploration of the dense woods that make up the game board. Typically your character will start in a clearing and then you’ll be able to navigate along roads and paths to the next adjacent hex. The first step (after generating the background) is to choose where the player starts, work out where the player needs to get to, and then create a random path from point A to point B. This is called “path generation” and is something I’ve been focused on for the last week or so.
To begin with, I have a scenario JSON file which will dictate the fixed elements of the current scenario. It looks something like this presently:
{
    "title": "In the beginning",
    "map": {
        "columns": 8,
        "rows": 8,
        "start": {
            "environment": "clearing",
            "distanceFromBoardEdge": 0
        },
        "finish": {
            "minimumDistanceFromStart": 6,
            "maximumDistanceFromStart": 9
        }
    }
}
We’re most interested in the map section which defines the basic size of the map (8 by 8) and gives us a rough indication of where to start and finish; in this case, we’re going to place a “clearing” tile somewhere on the edge of the grid and have the finish be 6 to 9 hexes away from the start. This sense of randomness should mean that scenario’s can be replayed and still feel fresh; there will be story beats that are consistent but the random layout and random encounters should keep it interesting.
In my first iteration of the path finding code, I thought the easiest solution would be to pick my random starting hex, pick the distance (if there is a min/max), and then generate every single possible route before picking one at random. Doing this is relatively straightforward:
func possibleRoutesToVictory(from start: String) -> Set<String> {
    let distance = Int.random(in: finish.minimumDistanceFromStart...finish.maximumDistanceFromStart) + 1
    var routes = Set<String>()
    enlargeRoute(start, routeDistance: distance, routes: &routes)
    return routes
}

private func enlargeRoute(_ route: String, routeDistance: Int, routes: inout Set<String>) {
    let references = route.components(separatedBy: "-")
    guard references.count < routeDistance else {
        routes.insert(route)
    }

    guard let reference = references.last else {
        fatalError("Could not get last reference")
    }

    guard let maxColumn = columns.toAlphabet(), let gridReference = reference.toGridReference() else {
        fatalError("Could not create maxColumn or gridReference")
    }

    let neighbours = gridReference.neighbours(maxColumn: maxColumn, maxRow: rows).filter({!references.contains($0)})
    for neighbour in neighbours {
        enlargeRoute("\(route)-\(neighbour)", routeDistance: routeDistance, routes: &routes)
    }
}
Our possibleRoutesToVictory function is given the starting hex position, picks the length of the route, and then creates an empty Set that can hold strings. The strings in this set will look something like A1-B2-B3-C3-C2-C1-D1 and denote the grid reference of the hexes the route proceeds through; this set is returned at the end of the method so we can then pick a route to render.
The main part of the process is calling a recursive function named enlargeRoute that takes a route string, distance, and our routes set. It separates the passed route into grid references and checks to see if the count is equal to the hex distance we’re looking for. If it is, the string is put into the routes set as a valid path and the method exited. If not, we check all of the neighbours1 of the last hex in the route and run this method again on every hex that isn’t already present in the route thus potentially spawning up to 6 new routes. In this way, we gradually increase the length of the route and create new routes until we’ve gone through every single possible iteration.
Once completed, we have a set of route strings and we can pick one at random to use as our route. For a journey with a distance of 6 hexes this translates into just over 4000 choices for us to choose from:
This seems great in theory but it quickly unravelled when I tried longer paths. For example, a distance of 10 hexes turned into 788,550 possible routes taking 7 seconds to generate. That’s not going to work. 😂
My first thought is that things are obviously quicker when we’re working in smaller chunks as there are far less choices. I thought I could maybe break the routes into pieces by turning a 12 hex route into three sets of 4 hex routes. That could potentially lead to a lot of dead ends though as it would be easy for the hexes to get trapped against a wall or corner which would then mean the routes could never complete (and whilst I could mitigate that by regenerating the initial 4 hex seeds and starting again it was getting a bit convoluted).
Instead, the final version was painfully simple. In the code above I’m generating every single route but what if I just stopped inserting into the set after 1 route is generated? With the current code that would mean the path would always be the same as the neighbours are tested in the same order every time but randomising that would lead to the result I was looking for.

All I needed to do was shuffle the array of hex neighbours that are returned and then exit the function once a single route is found. This leads to paths being generated in a mere 2 milliseconds, even when they are 40 hexes long.

The end result works well as it runs until it finds a valid route; if the random nature of the first route ends in a spiral that means we can’t get to the full length of the route then it doesn’t matter as it will keep iterating through every choice until a single route is found, then stop to avoid wasting further cycles on a solved problem.
With this now working as intended, the next step is to start drawing a path on top of the hex tiles before beginning the process of adding some dead ends and shortcuts throughout the map.
-
The calculation for the neighbours of a hex is fairly simple translating the current grid reference and then determining what the 6 hexes around it will be. It needs a maxColumn and maxRow as we don’t want to return hexes that are on the outside of the bounds of the board. We already know not go below 0,0 so we don’t require a minimum. ↩︎
SKLightNode, normal maps, and light scaling
One of my aims with The Forest is to make it feel like you are genuinely exploring a vast forest, the size and scale of which are unknowable to the player. When you’re stood in a dense forest in the real world, it’s hard to tell if you’re miles or metres away from the exit and that’s what I want to get across here. In the first instance, I’ve extended my hex grid tile map from last month by adding three additional tiles worth of depth around the main board. The reason for this is that the camera will be locked to the main board so if you scroll to the edge you won’t see the edge of the tiles but rather a continuation making it seem larger than it really is. The second element and the focus of today’s article is to introduce lighting, or more specifically, lack of lighting.
To begin with, I’m going to alter my tile map by fully blending it with the grey colour I use for the background upon which all the tiles sit using color and colorBlendFactor. This will ensure the background tiles are dark whilst the revealed tiles look almost backlit:
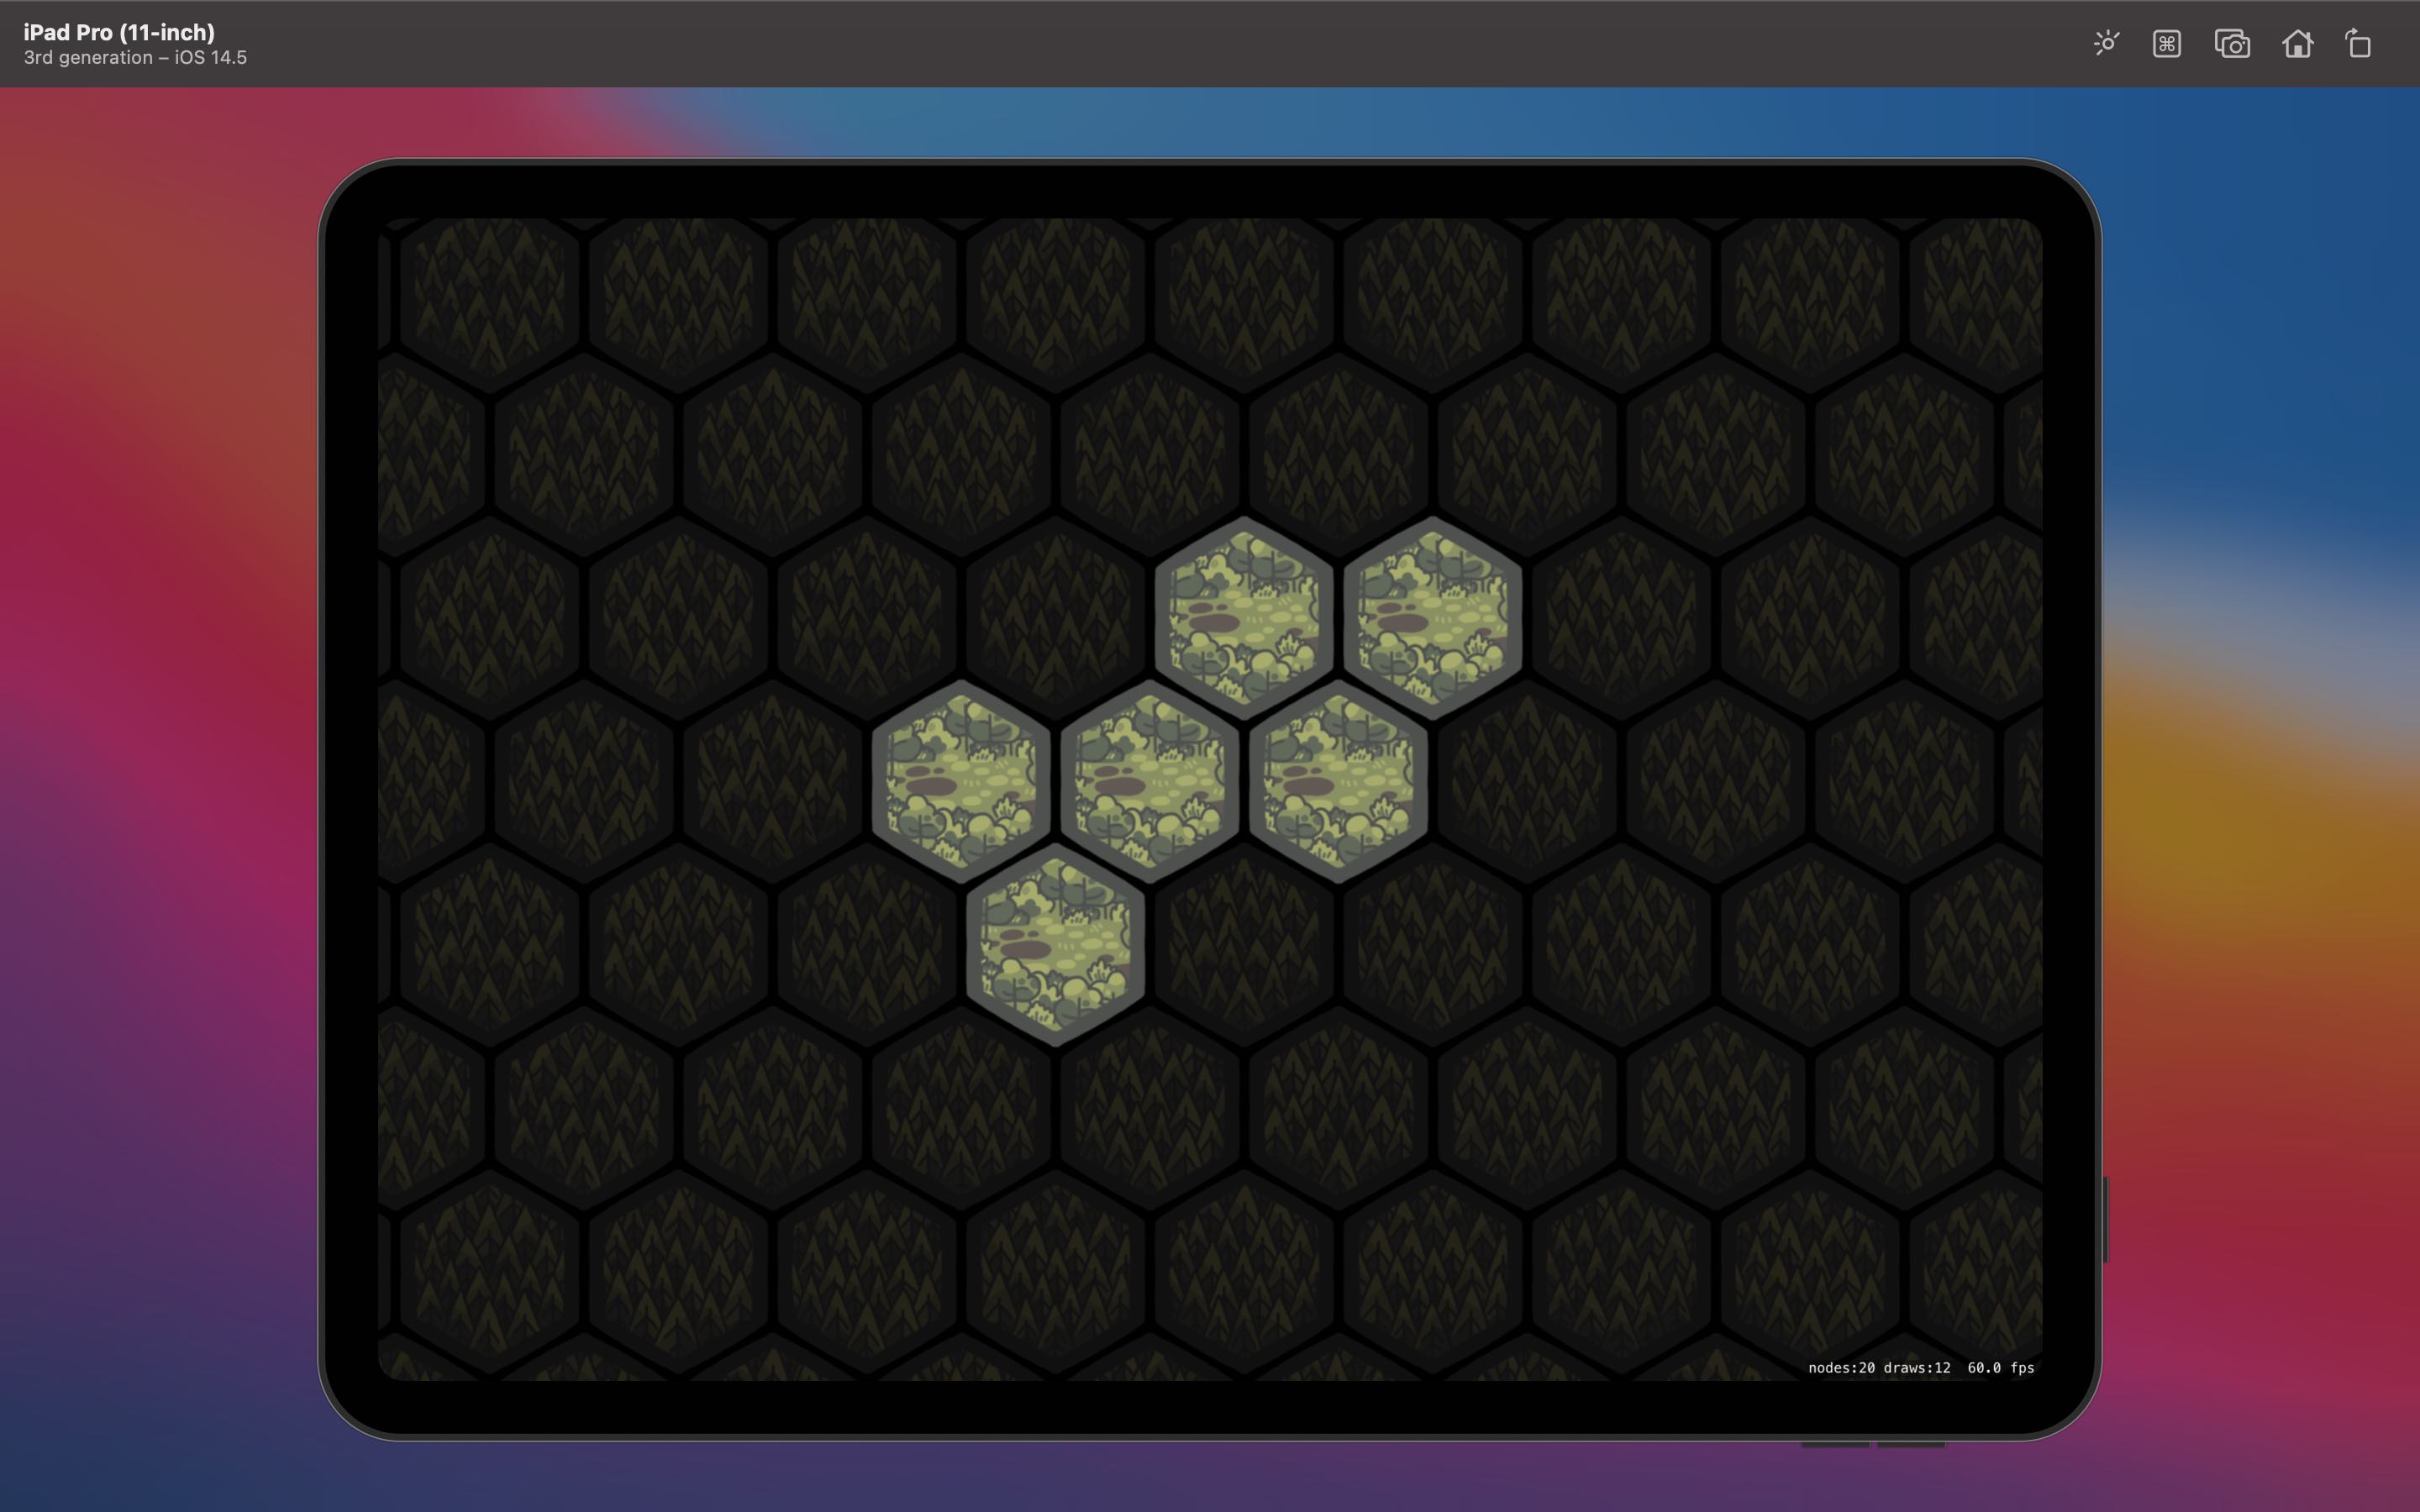
This already looks much better and immediately focusses attention on the currently active tiles. However, we can go a step further by taking advantage of light nodes to provide dynamic lighting. The first step is to set our tile map to use a lightingBitMask; you can use different bits so that certain lights can affect different nodes but for now we’re just setting it to 1. Our map will now respect any light that is thrown at it. To do that, we need to add an SKLightNode to each of our revealed tiles:
let node = SKLightNode()
node.categoryBitMask = 1
let colors: [UIColor] = [.white, .blue, .orange]
node.lightColor = colors.randomElement() ?? .white
node.zPosition = 10
node.falloff = 1.8
addChild(node)
We create a light node and set its categoryBitMask to match the lightingBitMask of the nodes we want to illuminate (in this case the background tile map). Then we choose a colour, set our Z position so we’re on top of our map, choose the rate of decay for our light (known as falloff), and add it to our scene. An SKLightNode is itself invisible; it’s only purpose is to affect the light on other nodes. The end result looks pretty good:
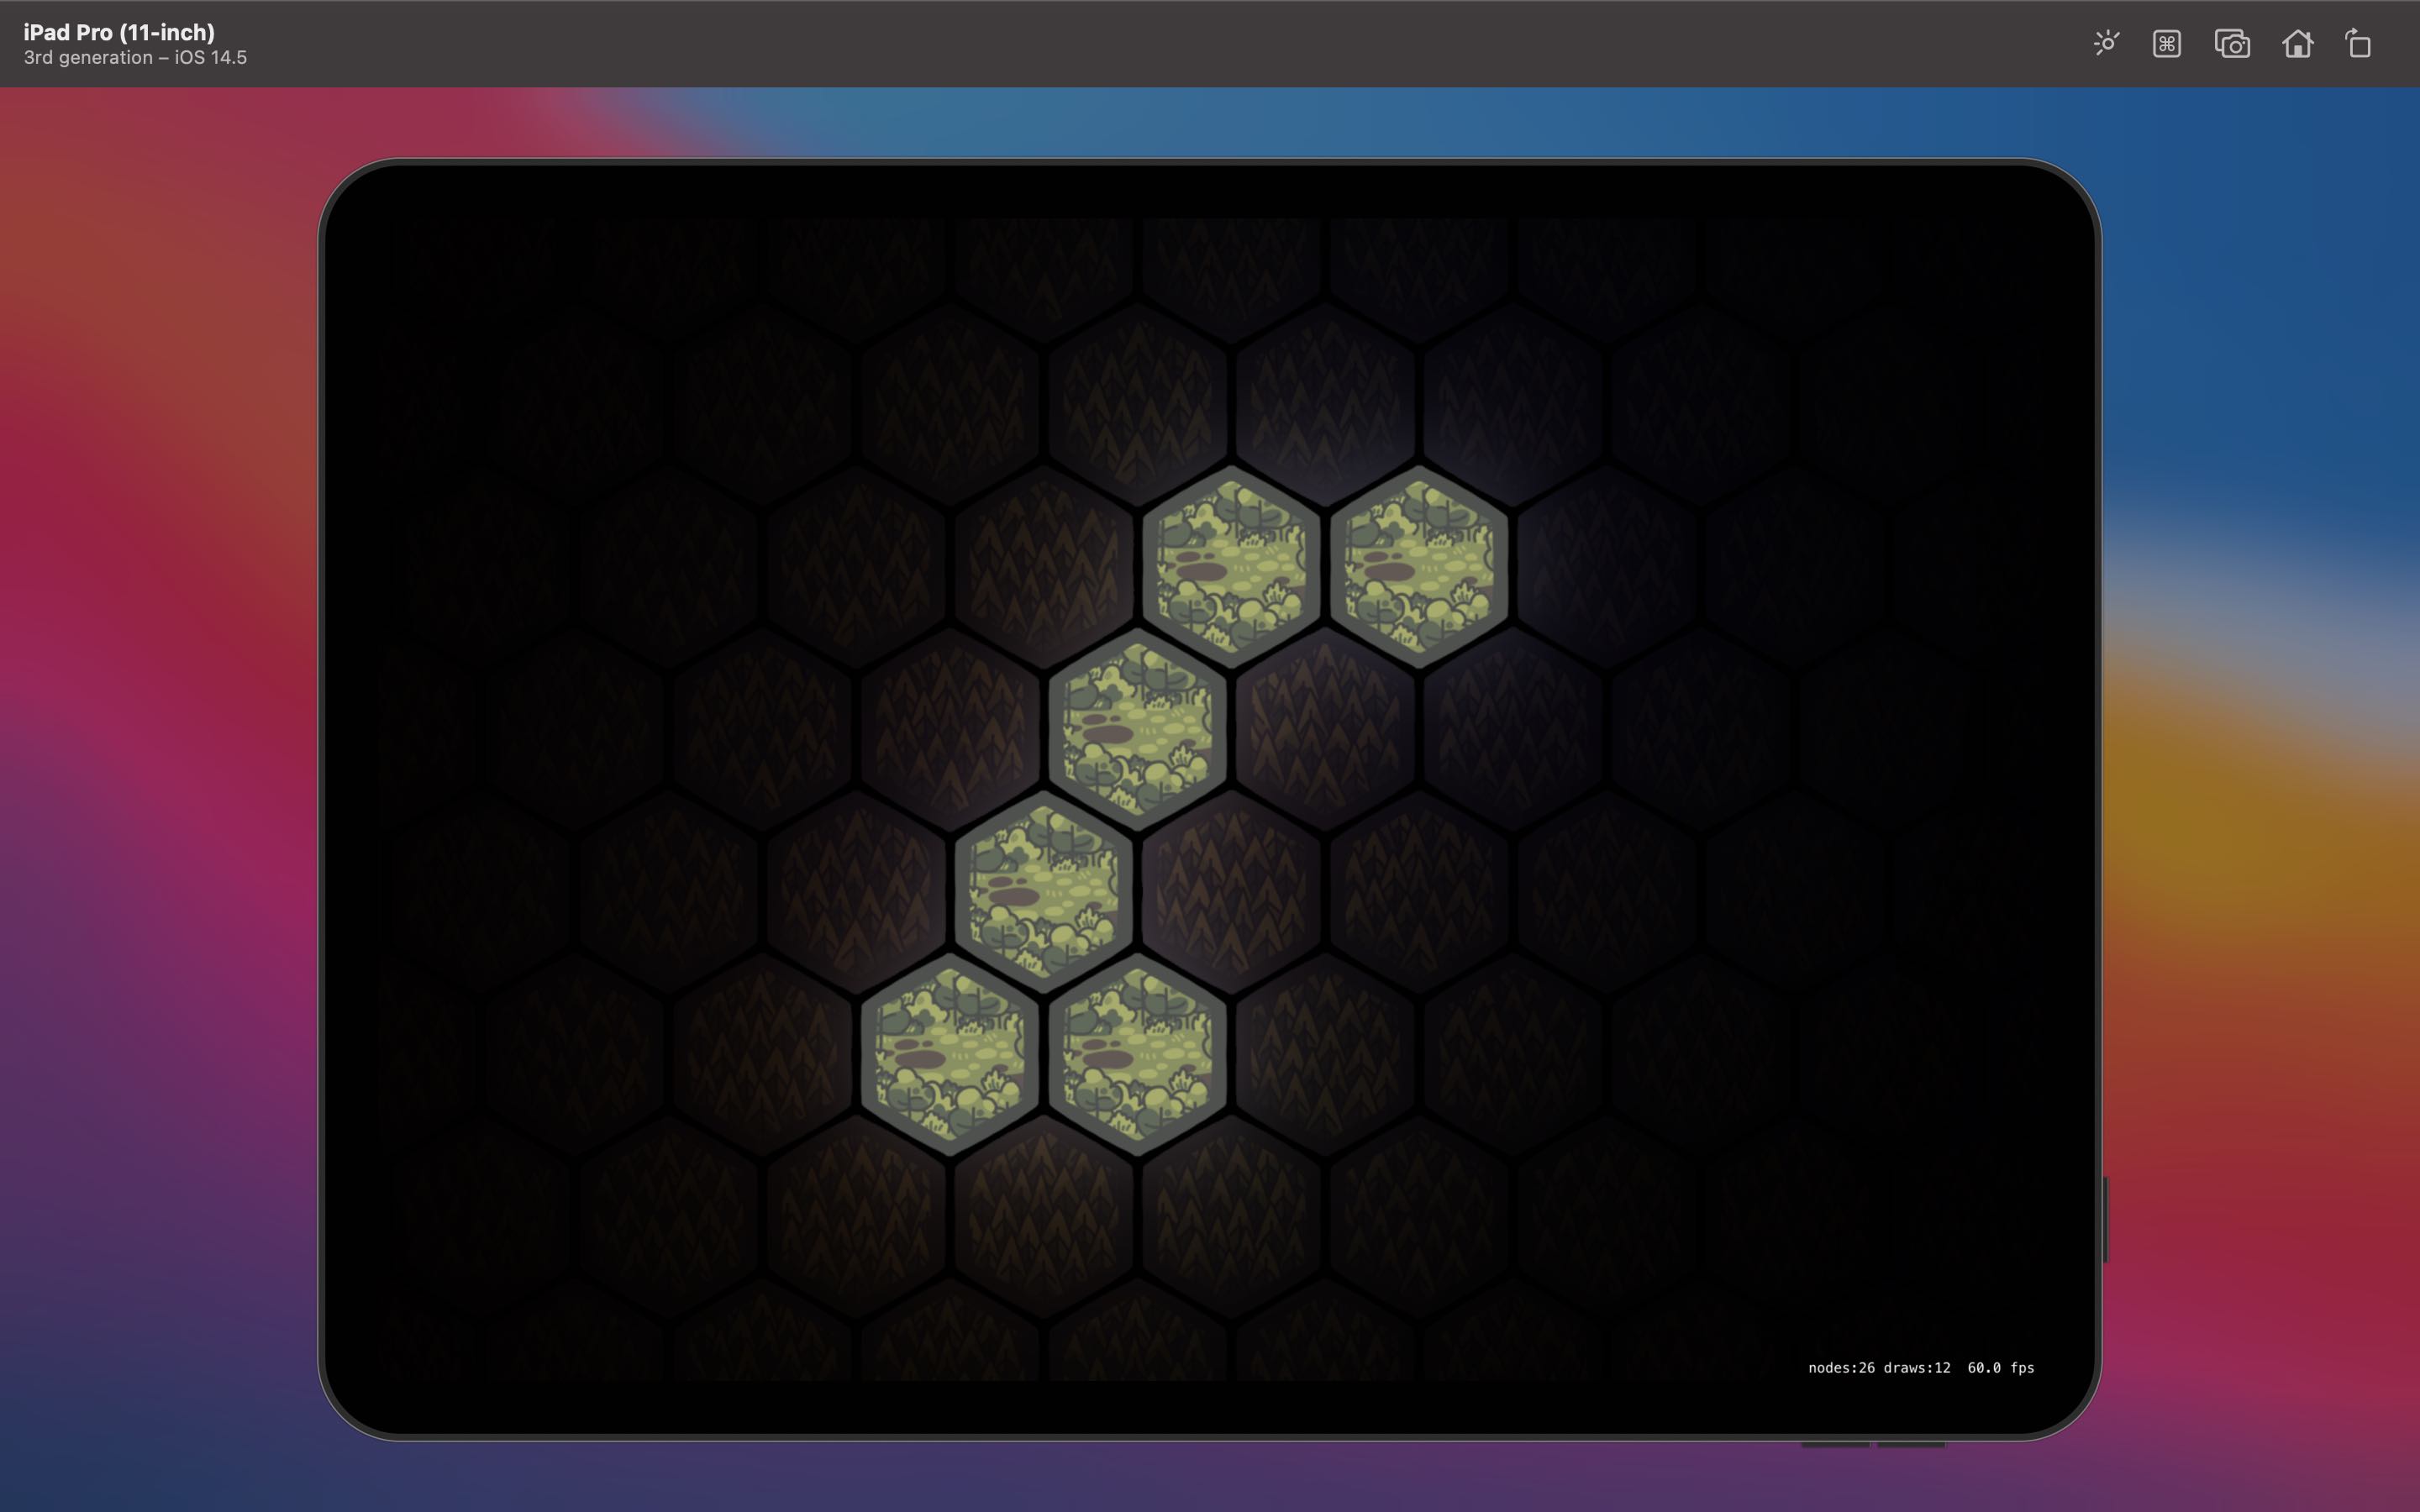
Whilst we haven’t changed the revealed tiles at all, they now stand out even more thanks to the background tiles slowly fading into blackness. If you were to scroll to the sides you’d eventually see nothing which is exactly how I wanted it. There is one more improvement that can be made and that’s to incorporate a certain amount of depth to the tiles. To do this, we use normal maps which are described as a “texture mapping technique used for faking the lighting of bumps and dents”1. You can use an app like SpriteIlluminator to take your 2D images and convert them into normal maps for use within SpriteKit and this is exactly what I did before realising that you can already do this for free with SpriteKit. 🤦🏻♂️
private func addNormalTextures() {
    var normalMaps = [String: SKTexture]()
    for r in 0..<map.numberOfRows {
        for c in 0..<map.numberOfColumns {
            let definition = map.tileDefinition(atColumn: c, row: r)
            guard let name = definition?.name else { continue }
            if normalMaps[name] == nil {
                normalMaps[name] = definition?.textures.first?.generatingNormalMap(withSmoothness: 0.2, contrast: 0.2)
            }
            if let texture = normalMaps[name] {
                definition?.normalTextures = [texture]
            }
        }
    }
}
To do this, we need a function to loop through each hex in the tile map. If we haven’t already generated a normal map for the current tile definition (which is one of ten different images I use for the tile map) then we go down to the texture and generate a map with a smoothness and a contrast of 0.2, a figure I came to by trial and error2. Once done, the resulting map is stored in a temporary caching array before being added as a normal texture to the tile definition. Whilst apps like SpriteIlluminator give you a lot more freedom to create customised normal maps, the built in methods within SpriteKit are perfect for my needs and save me having to manually generate and store the maps for every texture I want to use. The end result is a vast improvement again:
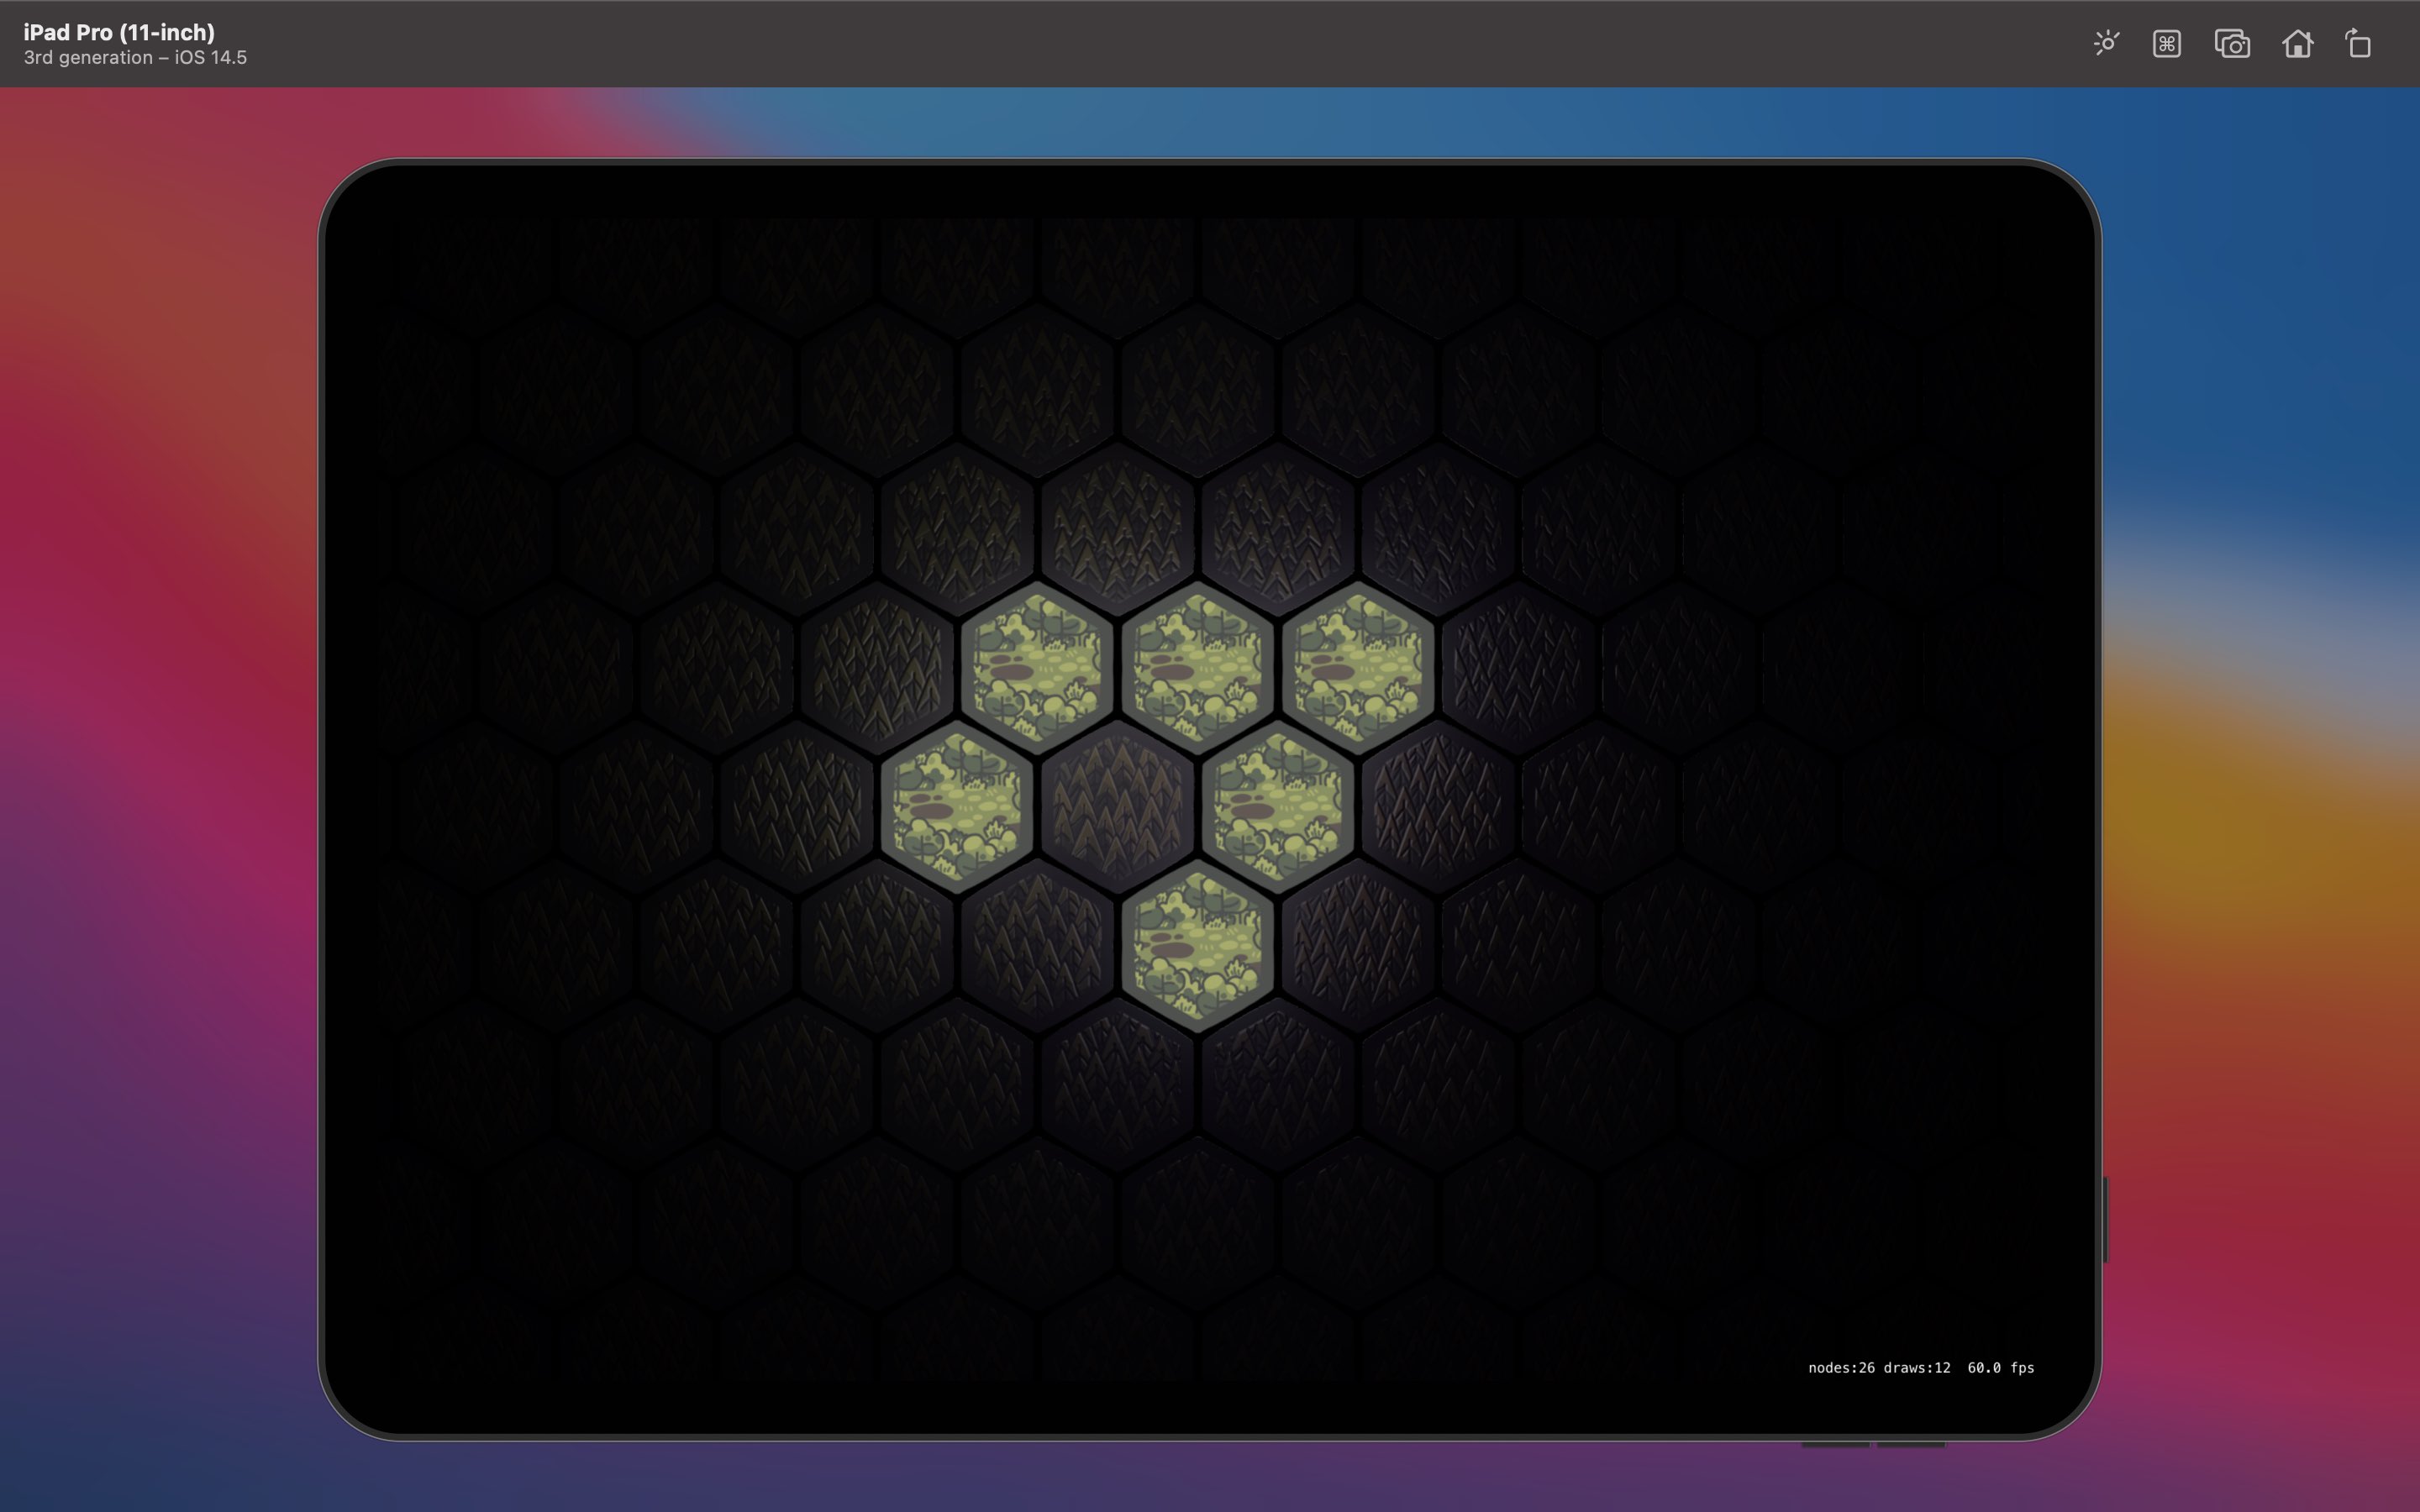
The individual trees on the tile are now slightly embossed leading to extra shadow detail based on the light coming from the revealed tiles. I particularly like that the trees blending into the darkness can be seen by the light glinting from the tips whilst the rest is obscured.
Whilst I’m happy with where things are now, a new issue appeared when I started to zoom in and out of my board using an SKCameraNode; the light does not scale. It turns out that the light nodes might be based on the SKView size rather than that of the scene so the camera does not adjust them. My solution was to create a subclass of SKLightNode which reacts to the camera changing and adjusts its falloff accordingly:
class ScalableLightNode: SKLightNode {

    var fixedFalloff: CGFloat

    init(falloff: CGFloat) {
        self.fixedFalloff = falloff
        super.init()
        NotificationCenter.default.addObserver(self, selector: #selector(scaleDidChange), name: BoardCameraMaster.Notification.cameraScaleDidChange, object: nil)
    }

    required init?(coder aDecoder: NSCoder) {
        fatalError("init(coder:) has not been implemented")
    }

    @objc func scaleDidChange(notification: Notification) {
        guard let scale = notification.userInfo?["scale"] as? CGFloat else {
            fatalError("BoardCameraMaster.Notification.cameraScaleDidChange received with no scale")
        }
        updateFalloff(scale)
    }

    func updateFalloff(_ scale: CGFloat) {
        falloff = fixedFalloff * scale
    }

}
The node uses NotificationCenter to be alerted when the camera scale has changed and then updates its falloff based on the initially provided value multiplied by the scale. The end result is not perfect (the radius seems to shrink faster when you’re zoomed out) but it’s close enough for my needs:
This would be a good place to stop but unfortunately there are two final wrinkles that are going to cause problems. Firstly, if I add a light node to every revealed tile then the amount of light gets compounded; this leads to the board being far too illuminated as more tiles get revealed. Secondly, there appears to be a limit to how many light nodes you can have; once exceeded, they just don’t appear. That’s not going to work. 😂
To remedy this, I think I’m going to only have a light node on the tile in which the player character is currently standing. This will illuminate the bit of forest they are stood in but the path they have taken will still be “lit up” by virtue of being a revealed tile that isn’t affected by lighting; it just won’t cast an ambient glow into the surrounding trees. That will leave me with enough light nodes to do other interesting effects like showing a campfire in the distance or have flashes of lightning in a storm that light up the whole forest temporarily.
That’s a job for another day though as I’m now keen to get on with the process of actually generating the paths that will turn this into something more closely resembling a game…
-
Wikipedia. Normal Mapping ↩︎
-
The precise numbers you want will vary depending on the effect you’re going for and the starting 2D image. ↩︎
Building a hex grid with SpriteKit
A large portion of the gameplay of The Forest will take place on a hex grid akin to board games like Terraforming Mars, Gloomhaven, and 1861: The Railways of the Russian Empire1. The majority of the board will be tiles that are never interacted with; these will just display some trees and will help give a sense of scale to the area. The remainder will be interactive tiles that can be flipped over to chart your course through the woods. In my head, I assumed I’d need to render each tile manually by looping through every column and every row and drawing the tile with a bit of offset on each row so they stack neatly. It turns out that SpriteKit already has this covered for us with SKTileMapNode.
The idea behind the SKTileMapNode is to draw background maps akin to something you’d see in the 2D Zelda games. For example, you might have some grass that turns into a desert and has a river running through. This would typically be generated in advance and Apple provides a way to create these kinds of maps using the SpriteKit Scene Editor within Xcode2. They also provide a way to procedurally generate maps if you want to create something randomised including adjacency rules so you can specify complex ideas like how a shoreline should work3.
I don’t need anything quite that sophisticated but this does work well in terms of generating a random distribution of background tree tiles for my map. To begin with, I have 10 different images for the hexes I want to generate as my base map all courtesy of the excellent Isle of Lore 2 Hex Tiles Regular set by Steven Colling.

These images can all be placed into a SpriteKit Tile Set file within Xcode where we can define that they are of a “Hexagonal Pointy” type4. With that done, it’s a simple case of adding the map to our scene:
guard let tileSet = SKTileSet(named: "Forest Tiles") else {
    fatalError("Could not find Forest Tiles set")
}
let map = SKTileMapNode(tileSet: tileSet, 8: columns, rows: 8, tileSize: .init(width: 210, height: 210))
map.fill(with: tileSet.tileGroups.first)
map.name = "background"
map.zPosition = 0
addChild(map)
When creating the SKTileMapNode we tell it which SKTileSet to use (based on the *.sks file we created earlier), the number of columns and rows we want, and the size each tile should be displayed at. We then tell the map to fill using the tile set which will generate the map using a random mix of the 10 tiles we made available. Finally we name the node for use later on, set the zPosition to be 0 so it sits below everything, and add it to the scene. The end result is a fixed hex grid with a random distribution of tree images:
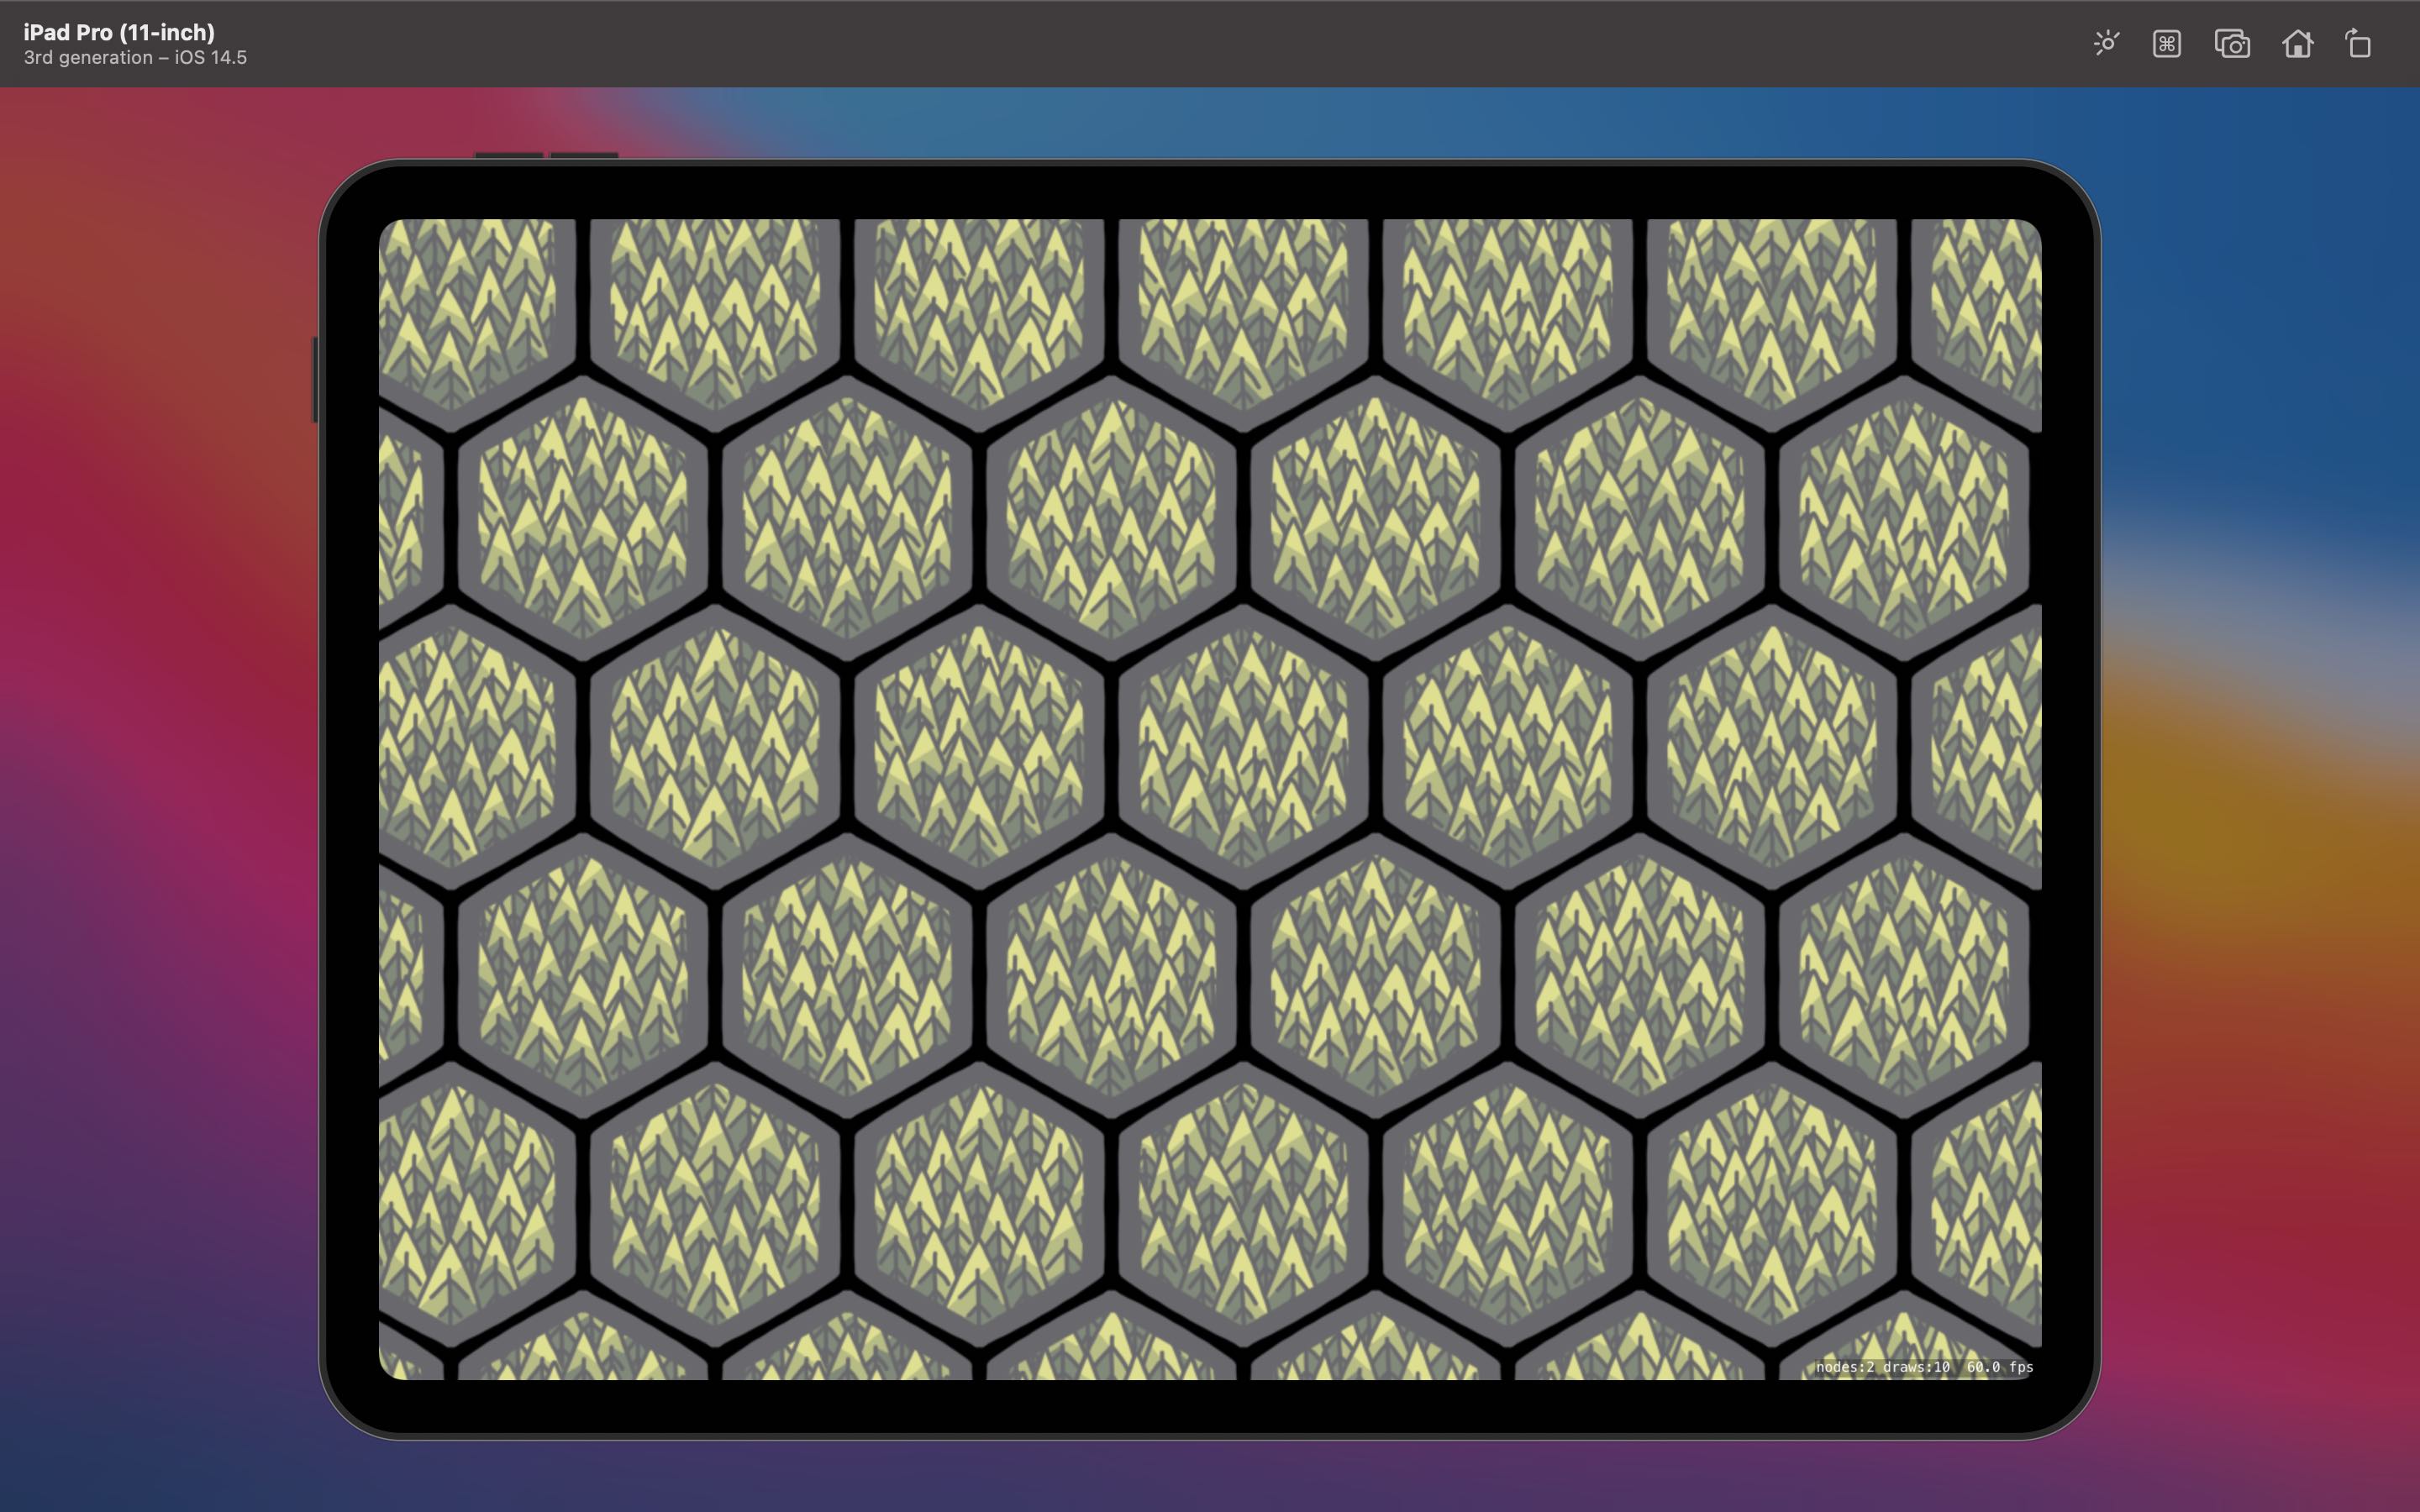
The main advantage to this method (beyond concise code) is that it is also far more efficient as it is a single node within SpriteKit; adding each tile manually would result in a node for every tile. However, we can’t interact with this grid so we need to do some more work in order to add our actual game tiles.
Fortunately, it’s fairly easy to ascertain where we are on the tile map as there is a centerOfTile(atColumn column: Int, row: Int) method which gives us a CGPoint for the center of a defined tile. All I need to do is choose where I want my real tiles to go (by way of a grid reference) and then add them to the scene using the position that the tile map returns for that particular reference.
I’m planning on having tiles flip over when you interact with them which adds an extra wrinkle as you’ll be able to see this base tile map behind the flip animation. To do that, I need to ensure that when I add a tile on top of the map that I also alter the tile group to use a blank hex that is the same colour as the background of the scene:
let definition = SKTileDefinition(texture: SKTexture(imageNamed: "hex_background"), size: .init(width: 210, height: 210))
let group = SKTileGroup(tileDefinition: definition)
map.setTileGroup(group, forColumn: column, row: row)
After playing around with light nodes and overlays (which I’ll detail in a later post), a test rendering looks something like this:
Whilst the scene has lighting and multiple visible hexes5, it’s really only made up of the six tiles you see on top (which look like background tiles until an animation appears to make them flip) and the background tile map with a few blank hexes strategically placed. I’m very happy with how easy it was to get started with a hex board in SpriteKit and will now be moving on to the process of generating the various tiles that will be placed on the board.
-
A personal favourite of mine. Trains? Stock markets? The ability to screw over your opponent, perform a hostile takeover of their company, then drive it into the ground for personal gain? Perfection. 👨🏻🍳🤌🏻 ↩︎
-
It’s a wysiwyg interface suitable for a designer to create a map with no programming knowledge. Check out this tutorial from The Liquid Fire to see it in action. ↩︎
-
For a deep dive, check out this tutorial from Hacking with Swift that shows you how to create a procedurally generated map with water, grass, and sand. ↩︎
-
Other choices include “Grid”, “Isometric”, and “Hexagonal Flat”. ↩︎
-
I forgot to take an animation when I originally built this feature so had to use one once other work had already been done. You can learn about the lighting in my next article. ↩︎